Making a fancy window in wxPython
I’m pretty much a n00b when it comes to GUI programming. The truth of the matter is, I *hate* to program a GUI by assembling its parts together inside code. I mean, things like:
- prepare an app object
- prepare a window object
- prepare a panel object (or several thereof)
- prepare a sizer (layout manager) object (or several thereof)
- sepcify initial sizes and dimensions
- bind events
- etc etc ..
Of course, this is an excuse for procrastination.
Also the fact that there are several frameworks outthere (wxwidgets, qt, etc) cause further confusion.
Anyway, for varios reasons, I’m trying to experiment with wxPython (the python interface to wxWidgets). And also for some reasons which I won’t go through, I wanted to make a “fancy” sort of window (like launchy’s window):
- Has round corners
- Maybe some transparency
- Draggable around
- No standard windows frames, buttons, etc
- always on top
I’ll go through making each requirement of those, but since I’m a n00b myself, and just started, maybe I’m doing something simple in an overly complex way, so please let me know if you spot such issues with this post.
I’ll start with the easier stuff: always on top, no frames buttons etc, and some transparency.
First of all, read ZetCode’s “First Steps” tutorial for a very basic structure of an “app” that consists of a single window (frame)
So, Here’s a basic “empty” application, with nothing more than a window.
import wx

class FancyFrame(wx.Frame):
    def __init__(self):
        wx.Frame.__init__(self, None, title='Fancy')
        self.Show(True)

app = wx.App()
f = FancyFrame()
app.MainLoop()
Note that we’re subclassing Frame. I suppose it’s also possible to achieve this functionality without subclassing it, but this is the way I’m doing it, so .. there.
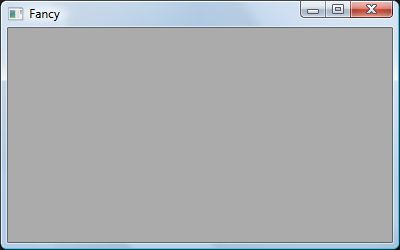
The result is the following:

Empty normal window
Nothing fancy yet.
Now, make it always on to, and without any borders or controls, it’s really simple: just supply a “styles” parameter to the frame constructor.
You can see a list of styles here: http://docs.wxwidgets.org/2.6/wx_wxframe.html
We’ll use these styles:
wx.CLIP_CHILDREN | wx.STAY_ON_TOP | wx.NO_BORDER | wx.FRAME_SHAPED
By simple specifying some style other than the default, we already lost all the default stuff (the title bar and the minimize/maximize/close buttons).
import wx

class FancyFrame(wx.Frame):
    def __init__(self):
        style = ( wx.CLIP_CHILDREN | wx.STAY_ON_TOP |
                  wx.NO_BORDER | wx.FRAME_SHAPED  )
        wx.Frame.__init__(self, None, title='Fancy', style = style)
        self.Show(True)

app = wx.App()
f = FancyFrame()
app.MainLoop()
So now we have .. nothing! Just a gray rectangle! You might wonder, how are we gonna close that? Well, for now you can use alt-F4
Let’s add transparency too, it’s just a single line of code:
self.SetTransparent( value )
The value is from 0 to 255, with 0 being completely transparent, and 255 being competely opaque. Let’s use 220
import wx

class FancyFrame(wx.Frame):
    def __init__(self):
        style = ( wx.CLIP_CHILDREN | wx.STAY_ON_TOP |
                  wx.NO_BORDER | wx.FRAME_SHAPED  )
        wx.Frame.__init__(self, None, title='Fancy', style = style)
        self.SetTransparent( 220 )
        self.Show(True)

app = wx.App()
f = FancyFrame()
app.MainLoop()
Now, we have a transparent gray box!
Well, it’d be nice if we can close it with somethign other than alt-F4. That’s simple, we’ll just need an event handler for keyboard events. We’ll also add a wx.FRAME_NO_TASKBAR style so our “fancy” window doesn’t appear on the task bar. (is that evil?)
import wx

class FancyFrame(wx.Frame):
    def __init__(self):
        style = ( wx.CLIP_CHILDREN | wx.STAY_ON_TOP | wx.FRAME_NO_TASKBAR |
                  wx.NO_BORDER | wx.FRAME_SHAPED  )
        wx.Frame.__init__(self, None, title='Fancy', style = style)
        self.Bind(wx.EVT_KEY_UP, self.OnKeyDown)
        self.SetTransparent( 220 )
        self.Show(True)
    def OnKeyDown(self, event):
        """quit if user press q or Esc"""
        if event.GetKeyCode() == 27 or event.GetKeyCode() == ord('Q'): #27 is Esc
            self.Close(force=True)
        else:
            event.Skip()

app = wx.App()
f = FancyFrame()
app.MainLoop()
So now there’s no taskbar, and q or Esc can quit.
Now we want to be able to move it around by just dragging it with the mouse. Again, we need an event handle for mouse movements. Dragging is really simple: when we start dragging, we record the relative position of the mouse. While we’re draging, we move the window so that the relative position of the mouse always stays the same.
There are several ways to implement this, I’ve seen code that uses two handlers: one for when the mouse is clicked, another handler for when moving the mouse. for me, I find it simpler to handle it all in one function that handles wx.EVT_MOTION, here’s the handler: (note that the event recieved is a MouseEvent )
#in ctor
        self.Bind(wx.EVT_MOTION, self.OnMouse)
#in class def:
    def OnMouse(self, event):
        """implement dragging"""
        if not event.Dragging():
            self._dragPos = None
            return
        self.CaptureMouse()
        if not self._dragPos:
            self._dragPos = event.GetPosition()
        else:
            pos = event.GetPosition()
            displacement = self._dragPos - pos
            self.SetPosition( self.GetPosition() - displacement )
This will make the window draggable.
So far, this is what we have:
import wx

class FancyFrame(wx.Frame):
    def __init__(self):
        style = ( wx.CLIP_CHILDREN | wx.STAY_ON_TOP | wx.FRAME_NO_TASKBAR |
                  wx.NO_BORDER | wx.FRAME_SHAPED  )
        wx.Frame.__init__(self, None, title='Fancy', style = style)
        self.Bind(wx.EVT_KEY_UP, self.OnKeyDown)
        self.Bind(wx.EVT_MOTION, self.OnMouse)
        self.SetTransparent( 220 )
        self.Show(True)

    def OnKeyDown(self, event):
        """quit if user press q or Esc"""
        if event.GetKeyCode() == 27 or event.GetKeyCode() == ord('Q'): #27 is Esc
            self.Close(force=True)
        else:
            event.Skip()

    def OnMouse(self, event):
        """implement dragging"""
        if not event.Dragging():
            self._dragPos = None
            return
        self.CaptureMouse()
        if not self._dragPos:
            self._dragPos = event.GetPosition()
        else:
            pos = event.GetPosition()
            displacement = self._dragPos - pos
            self.SetPosition( self.GetPosition() - displacement )

app = wx.App()
f = FancyFrame()
app.MainLoop()

Transparent Draggable Gray Box
The snapshot doesn’t make much sense, but it’s there for completeness’ sake.
Now the part that’s a bit tougher and more problomatic: giving it a decent shape.
We passed a wx.FRAME_SHAPED style to the wx.Frame ctor, so that we can set the frame’s shape. To set the shape, we call SetShape and pass it a Region object. We want to construct a region object that is basically a rectangle with round corners. The easiest way to set such a shape is from a bitmap. We can get such a bitmap from an image file, but that’s not the only way. Infact, I specifically want to be able to do that without any external media file. I asked on stackoverflow but no one gave me an answer, so I had to dig on my own.
So we need a bitmap of a roned-corner rectangle, where do we get that without a file? Well, I found that you can draw a bitmap without a file using a MemoryDC. Basically, you bind the memory dc to an empty bitmap, draw some stuff on the memorydc, then when you unbind it from the bitmap, all the stuff that we drew will be on the bitmap. All DC objects had a DrawRoundedRectangle method.
So, now we can get a bitmap object that has a rounded rectangle drawn on it. To get that into a shape (region), we must first set a color mask for the bitmap, where the areas that have the color mask are to be transparent, and thus not part of the region.
The process to get that shape involves quite a bit of code, so we’ll put it into its own function, which takes a width, height, and radius:
def GetRoundBitmap( w, h, r ):
    maskColor = wx.Color(0,0,0)
    shownColor = wx.Color(5,5,5)
    b = wx.EmptyBitmap(w,h)
    dc = wx.MemoryDC(b)
    dc.SetBrush(wx.Brush(maskColor))
    dc.DrawRectangle(0,0,w,h)
    dc.SetBrush(wx.Brush(shownColor))
    dc.SetPen(wx.Pen(shownColor))
    dc.DrawRoundedRectangle(0,0,w,h,r)
    dc.SelectObject(wx.NullBitmap)
    b.SetMaskColour(maskColor)
    return b

def GetRoundShape( w, h, r ):
    return wx.RegionFromBitmap( GetRoundBitmap(w,h,r) )
Now, we have a region, we need to apply it to the window. To do that, we have to call SetShape, but apparently there’s a little trick involved in order to achieve cross-platformity. In windows, we set the shape in the constructor, while in GTK we set it on the event of the window creation.
#in ctor:
        if wx.Platform == '__WXGTK__':
            self.Bind(wx.EVT_WINDOW_CREATE, self.SetRoundShape)
        else:
            self.SetRoundShape()

#in class body:
    def SetRoundShape(self, event=None):
        w, h = self.GetSizeTuple()
        self.SetShape(GetRoundShape( w,h, 10 ) )
So there, this makes the window rounded. Note however that we hard-coded the radius of the rounded corner, which is generally a bad idea.

Round corners (somewhat rough)
The problem is that the edges are rough, I don’t know how to properly fix this, so I’ll try to hide it by drawing a border.
We’ll need to handle Paint events and draw whatever we want in there:
For painting, we just get a PaintDC to the window, and draw a rounded rectangle on the entire window with a pen (border) and a brush (backgrond)
#in ctor:
        self.Bind(wx.EVT_PAINT, self.OnPaint)
#in class body:
    def OnPaint(self, event):
        dc = wx.PaintDC(self)
        dc = wx.GCDC(dc)
        w, h = self.GetSizeTuple()
        r = 10
        dc.SetPen( wx.Pen("#806666", width = 2 ) )
        dc.SetBrush( wx.Brush("#80A0B0") )
        dc.DrawRoundedRectangle( 0,0,w,h,r )
The GCDC makes the drawing anti-aliased. (I tried to use it when making the shape but it didn’t work, or I didn’t know how to properly make it work).
For an additonal touch, we’ll call SetPosition() so the window starts somehwere in the middle of the screen rather than the top left corner
import wx

def GetRoundBitmap( w, h, r ):
    maskColor = wx.Color(0,0,0)
    shownColor = wx.Color(5,5,5)
    b = wx.EmptyBitmap(w,h)
    dc = wx.MemoryDC(b)
    dc.SetBrush(wx.Brush(maskColor))
    dc.DrawRectangle(0,0,w,h)
    dc.SetBrush(wx.Brush(shownColor))
    dc.SetPen(wx.Pen(shownColor))
    dc.DrawRoundedRectangle(0,0,w,h,r)
    dc.SelectObject(wx.NullBitmap)
    b.SetMaskColour(maskColor)
    return b

def GetRoundShape( w, h, r ):
    return wx.RegionFromBitmap( GetRoundBitmap(w,h,r) )

class FancyFrame(wx.Frame):
    def __init__(self):
        style = ( wx.CLIP_CHILDREN | wx.STAY_ON_TOP | wx.FRAME_NO_TASKBAR |
                  wx.NO_BORDER | wx.FRAME_SHAPED  )
        wx.Frame.__init__(self, None, title='Fancy', style = style)
        self.SetSize( (300, 120) )
        self.SetPosition( (400,300) )
        self.SetTransparent( 220 )

        self.Bind(wx.EVT_KEY_UP, self.OnKeyDown)
        self.Bind(wx.EVT_MOTION, self.OnMouse)
        self.Bind(wx.EVT_PAINT, self.OnPaint)
        if wx.Platform == '__WXGTK__':
            self.Bind(wx.EVT_WINDOW_CREATE, self.SetRoundShape)
        else:
            self.SetRoundShape()

        self.Show(True)

    def SetRoundShape(self, event=None):
        w, h = self.GetSizeTuple()
        self.SetShape(GetRoundShape( w,h, 10 ) )

    def OnPaint(self, event):
        dc = wx.PaintDC(self)
        dc = wx.GCDC(dc)
        w, h = self.GetSizeTuple()
        r = 10
        dc.SetPen( wx.Pen("#806666", width = 2 ) )
        dc.SetBrush( wx.Brush("#80A0B0") )
        dc.DrawRoundedRectangle( 0,0,w,h,r )

    def OnKeyDown(self, event):
        """quit if user press q or Esc"""
        if event.GetKeyCode() == 27 or event.GetKeyCode() == ord('Q'): #27 is Esc
            self.Close(force=True)
        else:
            event.Skip()

    def OnMouse(self, event):
        """implement dragging"""
        if not event.Dragging():
            self._dragPos = None
            return
        self.CaptureMouse()
        if not self._dragPos:
            self._dragPos = event.GetPosition()
        else:
            pos = event.GetPosition()
            displacement = self._dragPos - pos
            self.SetPosition( self.GetPosition() - displacement )

app = wx.App()
f = FancyFrame()
app.MainLoop()

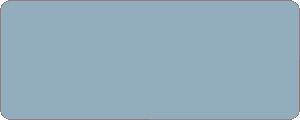
with color and border
There you have it, it’s not quiet so fancy, but it should be a good starting point for adding more fancier stuff.
Fantastic write-up. Just what I was looking for!
Thanks!
You saved my life, somewhat lol.
Thanks so much for posting this up!
Could you solve jagged border issue?
I’m still struggled with it
Create tutorial. You make it simple and clear. Thanks.
I ran your example, changed the FancyFrame to a wx.Window subclass (don’t forget to use wx.Window.__init__ () instead of wx.Frame.__init__() in Fancy.__init__()) and made a bunch of “fancy child windows” in my main frame. Mouse capture in this case behaved wierd. So I modified to OnMouse method to include a test to see if the mouse was already captured. Reason to do this is it seems each MouseCapture() call puts a reference on a stack and you would have to call ReleaseMouse() for each MouseCapture. So you only want to capture the mouse if you already haven’t captured it. And you want to release mouse capture only if you already have it, otherwhise you get a fatal error. This worked for me:
def OnMouse(self, event):
“””implement dragging”””
”’Any application which captures the mouse in the beginning
of some operation must handle wx.MouseCaptureLostEvent and
cancel this operation when it receives the event. The event
handler must not recapture mouse”’
if not event.Dragging():
self._dragPos = None
if self.HasCapture():
self.ReleaseMouse()
return
else:
if not self.HasCapture():
self.CaptureMouse() # only capture it once
if not self._dragPos:
self._dragPos = event.GetPosition()
else:
pos = event.GetPosition()
displacement = self._dragPos – pos
self.SetPosition( self.GetPosition() – displacement )
Good job. I would like to create a transparent frame with red borders using the following code. However, there are no borders shown. Could anybody tell me what’s wrong with the program? Thanks in advance.
———–
import wx
class FancyFrame(wx.Frame):
def __init__(self, width, height):
wx.Frame.__init__(self, None, style = wx.STAY_ON_TOP | wx.FRAME_SHAPED)
self.SetTransparent(100)
b = wx.EmptyBitmap(width, height)
dc = wx.MemoryDC(b)
dc.SetBrush(wx.TRANSPARENT_BRUSH)
dc.SetPen(wx.Pen(‘red’, 2))
dc.DrawRectangle(0, 0, width, height)
dc.SelectObject(wx.NullBitmap)
b.SetMaskColour(wx.Color(255, 0, 0))
self.SetShape(wx.RegionFromBitmap(b))
self.Bind(wx.EVT_KEY_UP, self.OnKeyDown)
self.Show(True)
def OnKeyDown(self, event):
“””quit if user press q or Esc”””
if event.GetKeyCode() == 27 or event.GetKeyCode() == ord(‘Q’): #27 is Esc
self.Close(force=True)
else:
event.Skip()
if __name__ == “__main__”:
app = wx.App()
f = FancyFrame(200, 200)
app.MainLoop()
———–
A note about my previous reply:
I mentioned that I changed the wx.Frame to a wx.Window class which worked in a previous version of wxPython.
However, the version wxPython ‘2.8.11.0 (msw-unicode)’ does not allow wx.Window to be used as a TopLevelWindow. I think a this was changed a few minor versions back.. The wx.Window class in wxPython is no longer a “TopLevelWindow” and is now a “Base implementation” class. The wx.App() does not allow “Base Implementations” to be used as TopLevelWindow classes. Also the wx.Window requires a parent as “None” does not seem to work. Odd its subclass wx.Frame does not need a parent but wx.Windows does.
To drag i registered the position of the mouse just on the first click so the mousehover not to check everytime if it was set or not. So i hope it works so that ur code be smaller and faster.
self.Bind(wx.EVT_LEFT_DOWN, self.OnClick)
self.Bind(wx.EVT_MOTION, self.OnMouseHover)
def OnClick(self, event):
self.startPos=event.GetPosition() #only assign when start dragging
def OnMouseHover(self, event):
if event.Dragging(): self.SetPosition(event.GetPosition()+self.GetPosition()-self.startPos)